Ooso : Serverless Mapreduce

Introduction
Big data processing is based on scalable and parallelizable algorithms, and is implemented with tools that run on distributed systems. Technologies such as Hadoop or Spark are the standards for this type of processing. While these frameworks are mature, powerful and supported by a huge community, the preparation of the infrastructure that these tools require is complex and not always possible. The idea behind Ooso is to take advantage of the great parallelization and scalability of the serverless to do the processing, without having to manage any servers.

Ooso leverages powerful managed services such as AWS Lambda and Amazon S3 to run MapReduce jobs with reasonable performance and costs. It lets you tackle many Big Data use cases such as Ad Hoc queries and Batch processing (Data cleaning and enrichment), while focusing on your business logic rather than operational constraints.
In this article, we are going to walk you through a concrete example of how to use the library. But before that, let’s take a quick look at the underlying architecture.
Ooso’s architecture
Ooso’s architecture comprises six lambda functions and three s3 buckets that coordinate to lead a MapReduce job from start to end. Following is the detailed architecture diagram and the workflow of the library.

The library workflow is as follows:
- The workflow begins by invoking the
Mappers Driverlambda function - The
Mappers Driverdoes two things:- It computes batches of data splits and assigns each batch to a
Mapper - It invokes a
Mappers Listenerlambda function which is responsible for detecting the end of the map phase
- It computes batches of data splits and assigns each batch to a
- Once the
Mappers Listenerdetects the end of the map phase, it invokes a first instance of theReducers Driverfunction - The
Reducers Driveris somewhat similar to theMappers Driver:- It computes batches from either the
Map Output Bucketif we are in the first step of the reduce phase, or from previous reducers outputs located in theReduce Output Bucket. It then assigns each batch to aReducer - It also invokes a
Reducers Listenerfor each step of the reduce phase.
- It computes batches from either the
- Once the
Reducers Listenerdetects the end of a reduce step, it decides whether to invoke the nextReducers Driverif the previous reduce step produced more than one file. Otherwise, there is no need to invoke aReducers Driver, because the previous step would have produced one single file which is the result of the job
Example of batch processing with Ooso
In the following sections of the article, we are going to see how easy it is to use Ooso to enrich data at rest, which is one of the frequent use cases of Big Data tools. We are going to use a dataset that contains records about yellow taxi trips in New York City. These records include fields capturing pick-up and drop-off dates/times, pick-up and drop-off locations, trip distances, itemized fares, rate types, payment types, and driver-reported passenger counts. The objective is to replace the ratecode with a textual value using an external data source that maps each ratecode to its real value.

We can summarize the steps as follows:
- Preparing the data
- Creating the project skeleton
- Declaring the dependencies
- Writing our Map and Reduce Logic
- Writing our Launcher
- Configuring the job
- Packaging the job and deploying the lambda functions and s3 buckets
- Running the job
Preparing the data
The dataset files have different sizes and some of them weigh up to 2GB, which will not hold on a single lambda function since the maximum possible RAM we can allocate to a lambda is 1536MB.
This problem was solved by transferring the data into an EC2 instance, splitting the data into chunks of 50MB using the linux command split --line-bytes 50M input.csv and then transferring the resulting splits back to S3. Of course, the whole process was automated using shell scripts.
Creating the project skeleton
Our project needs to follow the standard Maven structure:
.
├── package.sh
├── provide_job_info.py
├── pom.xml
└── src
    └── main
        ├── java
        │   ├── mapper
        │   │   └── Mapper.java
        │   └── reducer
        │       └── Reducer.java
        └── resources
            └── jobInfo.json
The mapper and reducer packages respectively contain the definition of our Mapper and Reducer.
The json file jobInfo.json will be used by the library to do various things as we will see shortly.
The scripts package.sh and provide_job_info.py are used during the packaging and deployment and are already provided in the library repository.
Declaring the dependencies
We declare the library dependency in the pom.xml file as follows:
    <dependencies>
    ...
        <dependency>
            <groupId>fr.d2-si</groupId>
            <artifactId>ooso</artifactId>
            <version>0.0.4</version>
        </dependency>
    ...
    </dependencies>
Note that you may as well declare any dependency that your business logic needs.
Writing our Map and Reduce Logic
Before implementing the Mapper and Reducer, it is always a good idea to create utility classes to wrap the raw data, which makes the code much cleaner and easier to understand.
First, we create the class that wraps the record data from each line.
public class Record {
    private String ratecodeID;
    //rest of the attributes

    public Record(String line) {
        //construct an instance from a string
    }
    //getters and setters

    @Override
    public String toString() {
        //construct a string by joining instance attributes
    }
}
We then create a class that wraps the data from the external source.
public class Rate {
    private String id;
    private String rate;

    public Rate(String line) {
        //construct an instance from a string
    }
    //getters and setters
}
Our Mapper must extend the fr.d2si.ooso.mapper.MapperAbstract class. It receives a BufferedReader as a parameter which is a reader of the batch part that the mapper lambda processes.
We begin by loading the external data (a csv file in this case), then we process each line of the input by replacing the ratecodeID by the corresponding value.
package mapper;

//imports

public class Mapper extends MapperAbstract {
    private final static String EXTERNAL_DATA_URL = "https://s3-eu-west-1.amazonaws.com/ooso-misc/rateCodeMapping.csv";
    private Map<String, String> idAndRate;

    @Override
    public String map(BufferedReader objectReader) {

        try (BufferedReader reader = getReaderFromUrl(EXTERNAL_DATA_URL)) {
            idAndRate = getRateMappingFromReader(reader);
            return processLines(objectReader);
        } catch (IOException e) {
            throw new RuntimeException(e);
        }
    }

    private BufferedReader getReaderFromUrl(String url) throws IOException {
        return new BufferedReader(
                new InputStreamReader(
                        new URL(url)
                                .openStream()));
    }

    private Map<String, String> getRateMappingFromReader(BufferedReader reader) {
        return reader
                .lines()
                .map(Rate::new)
                .collect(toMap(Rate::getId, Rate::getRate));
    }

    private String processLines(BufferedReader objectBufferedReader) throws IOException {
        List<String> records = objectBufferedReader
                .lines()
                .map(this::mapRateCode)
                .collect(toList());
        return String.join("\n", records);
    }

    private String mapRateCode(String line) {
        Record record = new Record(line);
        String rate = idAndRate.get(record.getRatecodeID());
        record.setRatecodeID(rate == null ? "NA" : rate);
        return record.toString();
    }
}
Although we clearly don’t need a reducer for this specific job, it is an important part of the library and is worth discussing.
The Reducer class is the implementation of your reducers. It must extend the fr.d2si.ooso.reducer.ReducerAbstract class which looks like the following:
public abstract class ReducerAbstract {
    public abstract String reduce(List<ObjectInfoSimple> batch);
}
The reduce method receives a list of ObjectInfoSimple instances, which encapsulate information about the objects to be reduced. In order to get a reader from anObjectInfoSimple instance, you can do something like this:
public String reduce(List<ObjectInfoSimple> batch) {
    for (ObjectInfoSimple objectInfo : batch) {
        try (BufferedReader objectBufferedReader = Commons.getReaderFromObjectInfo(objectInfo)) {
           //do something with the reader
        }
    }
    return result;
}
Writing our Launcher
Before jumping into the configuration and deployment part, we need to create our Launcher.
The Launcher will be responsible of serializing our Mapper and Reducer before sending them to the Mappers Driver and starting the job.
All you need to do is to create a class with a main method and instantiate a Launcher that points to your Mapper and Reducer. Your class should look like this:
import fr.d2si.ooso.launcher.Launcher;

public class JobLauncher {
    public static void main(String[] args) {
        //setup the launcher
        Launcher myLauncher = new Launcher()
                                        .withMapper(new Mapper())
                                        .withReducer(new Reducer());
        //launch the job
        myLauncher.launchJob();
    }
}
We can omit specifying a Reducer for this specific job since it will be discarded anyway.
In order to make our jar package executable, we need to set the main class that serves as the application entry point.
If you are using the maven shade plugin, you can do so as follows:
<build>
    ...
        <plugins>
            <plugin>
                ...
                <configuration>
                    <transformers>
                        <transformer implementation="org.apache.maven.plugins.shade.resource.ManifestResourceTransformer">
                            <mainClass>job.JobLauncher</mainClass>
                        </transformer>
                    </transformers>
                </configuration>
                ...
            </plugin>
        </plugins>
    ...
    </build>
Configuring the job
The configuration file is used by the library to compute the number of files attributed to the mappers and reducers. It is also used to turn the reducers on or off, declare the buckets used by the various layers of the library, etc. The jobId attribute is used to prefix the mappers and reducers outputs to avoid overwriting data between different jobs.
For our job, we can edit the configuration file as follows:
{
  "jobId": "my-job-id",
  "jobInputBucket": "input-bucket/data-prefix",
  "mapperOutputBucket": "mappers-bucket",
  "reducerOutputBucket": "reducers-bucket",
  "mapperFunctionName": "mapper",
  "reducerFunctionName": "reducer",
  "mappersDriverFunctionName": "mappers_driver",
  "reducersDriverFunctionName": "reducers_driver",
  "mappersListenerFunctionName": "mappers_listener",
  "reducersListenerFunctionName": "reducers_listener",
  "mapperMemory": "1536",
  "reducerMemory": "1536",
  "mapperForceBatchSize": "-1",
  "reducerForceBatchSize": "-1",
  "disableReducer": "true"
}
Packaging the job and deploying the Lambda functions and S3 buckets
Before deploying our lambda functions, we need to package the project in the jar format. It is straightforward to do so using Maven. Make sure you installed Mavenbefore proceeding.
As we saw earlier, you may use the script package.sh that we provided to package your project:
./package.sh
For the deployment part, we will be using Terraform which enables you to safely and predictably create, change, and improve production infrastructure. It is an open source tool that codifies APIs into declarative configuration files that can be shared amongst team members, treated as code, edited, reviewed, and versioned.
We already provided a fully functional template here. We will talk about the details of the template later.
Note that you’ll only need to deploy the lambdas once. You will be able to run all your jobs even if your business code changes without redeploying the infrastructure.
We can deploy the infrastructure using the following commands:
 #change the current directory to the location of your terraform template
 cd terraform

 #determines what actions are necessary to achieve the desired state specified in the configuration files
 terraform plan

 #starts the deployment
 terraform apply
Running the job
Running the job is as easy as executing the main method that contains our Launcher. You can either execute it directly from your IDE or use the following command:
java -jar job.jar
Diving into Terraform details
In this section, we are going to talk in more details about the Terraform template definition.
Our Terraform template relies on data from the configuration file. Fortunately, Terraform enables you to read external data and use it in your resources declaration. This is possible using what we call an external data source.
Following is the description of our external data source, it uses the provide_job_info.py script to make the content of a json document available for use inside the template:
data "external" "jobInfo" {
  program = [
    "python3",
    "/path/to/script/provide_job_info.py"]

  query = {
    path = "/path/to/config/file/jobInfo.json"
  }
}
As we saw earlier, we needed to create two buckets, one for the mappers and another for the reducers:
resource "aws_s3_bucket" "mapperOutputBucket" {
  bucket        = "${data.external.jobInfo.result.mapperOutputBucket}"
}

resource "aws_s3_bucket" "reducerOutputBucket" {
  bucket        = "${data.external.jobInfo.result.reducerOutputBucket}"
}
We also needed a role for our lambdas with the necessary policies attached. A role is similar to a user, in that it is an AWS identity with permission policies that determine what the identity can and cannot do in AWS. Our role must be able to execute lambda functions and interact with S3, hence the use of the AWSLambdaFullAccess and AmazonS3FullAccess policies:
resource "aws_iam_role" "iamForLambda" {
  name = "iamForLambda"

  assume_role_policy = <<EOF
{
  "Version": "2012-10-17",
  "Statement": [
    {
      "Effect": "Allow",
      "Principal": {
        "Service": "lambda.amazonaws.com"
      },
      "Action": "sts:AssumeRole"
    }
  ]
}
EOF
}

resource "aws_iam_policy_attachment" "lambdaAccessAttachment" {
  name = "lambdaAccessAttachment"

  roles = [
    "${aws_iam_role.iamForLambda.name}",
  ]

  policy_arn = "arn:aws:iam::aws:policy/AWSLambdaFullAccess"
}

resource "aws_iam_policy_attachment" "s3AccessAttachment" {
  name = "s3AccessAttachment"

  roles = [
    "${aws_iam_role.iamForLambda.name}",
  ]

  policy_arn = "arn:aws:iam::aws:policy/AmazonS3FullAccess"
}
We can then proceed with the definition of our lambda functions.
A nice feature of Terraform is that it uses the lambda package hash to detect changes in the code, and then decides whether to redeploy the lambda or not.
You can also define environment variables that will be available to the lambda. In our case, we set the SMR_STAGE variable to “PROD” to tell the library to use the real SDK clients instead of the mock clients. The mock clients are used for testing purposes only.
resource "aws_lambda_function" "mappers_driver" {
  filename         = "/path/to/job/jar/job.jar"
  function_name    = "${data.external.jobInfo.result.mappersDriverFunctionName}"
  role             = "${aws_iam_role.iamForLambda.arn}"
  handler          = "fr.d2si.ooso.mappers_driver.MappersDriver"
  source_code_hash = "${base64sha256(file("/path/to/job/jar/job.jar"))}"
  runtime          = "java8"
  memory_size      = "1536"
  timeout          = "300"

  environment {
    variables {
      SMR_STAGE = "PROD"
    }
  }
}
The rest of the lambdas are defined similarly. Visit the github repository for further details.
Results
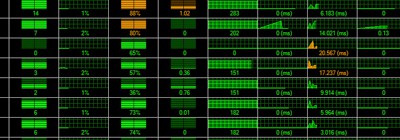
The job results in terms of duration and costs is shown by the following diagram:

The calculations take into account the number of invocations and the average duration of the lambdas along with the number of S3 requests. Lambda and S3 costs were respectively calculated using these tools: serverlesscalc.com and calculator.s3.amazonaws.com/index.html.
Use cases and limitations
Although Ooso works well for different types of Big Data workloads, it is recommended for data transformations rather than Ad Hoc queries. There are several tools for querying data stored on HDFS or S3 directly using SQL. Examples include Apache Hive or Dremel-based tools such as Apache Presto or Apache Drill to name a few. It is easier and more convenient to query SQL data given its declarative nature and most of us are used to it.

On the other hand, Ooso seems relevant for batch processing in some cases:
- No Hadoop cluster is available. One solution would be to use managed services (AWS EMR or Google Cloud Dataproc) to create an ephemeral cluster, but it turns out that this will be much slower than running the job using Ooso: the cluster creation time is about 10 minutes for EMR and 90 seconds for Dataproc
- You have a cluster that does not have enough resources for a given job. So you can use Ooso instead of scaling your cluster
Conclusion
Of course, this is just the beginning of Ooso and it is far from perfect. It would be awesome if you test the library yourself and tell us about the issues you encountered, if any. All ideas of features or improvements are welcome, feel free to make pull requests and contribute to the project.


